Wednesday, February 25, 2009

Raspberries

Kate and I have spent the past couple of days preparing the new raspberry bed and then planting a single row DSC_0019-2of 32 canes.

As ever in the garden, we started off with a patch of land that had been wild meadow for the past couple of years.  The soil here is chalky clay and very heavy.

The berry beds had already been marked out as part of the earlieDSC_0017-2r preparations, 2 beds running north/south,  each 7m (23' 6") by 1200mm (4 ft) with a 1m gap between them.  I quickly decided that it would be better to use the land as 1 bed 15m long by the 1200mm and so changed the marking.  It meant we lost an access into the middle of the vegetable plot but I don't think that matters.
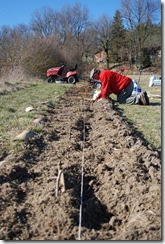
We had already planted a redcurrant bush at the north end of this bed but the change in length made no difference to that.

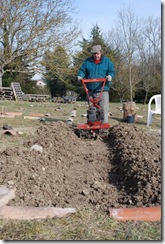
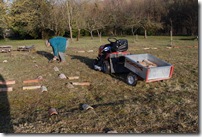
Next we started to work the soil.   Clay that has not been touched for a couple of years takes quite a lot of moving but we decided to use our power rotovator and soon starteDSC_0021-1d to break up the surface.  We had also decided to turn in the existing grass as a green manure.    After several hours of walking up and down the bed following and quietly coaxing the rotovator to work the area I wanted we seemed to be making some progress.     I operated the rotovator while Kate wheeled barrow load after barrow load of sand up for me to work in.
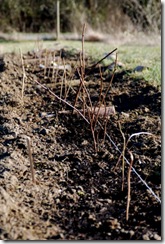
The composition of the soil improved in front of our eyes as the sand and grass worked it's magic on the heavy clay, and by the end of the day we had a bed with a much lighter and more workable soil composition.

The next day we returned and spent the morning reworking the bed a little more before resetting the rotovator to a narrow setting to allow us to work a deeper trench in the middle.   All the time we were adding sand, dry grass and compost to the mix.DSC_0023-1
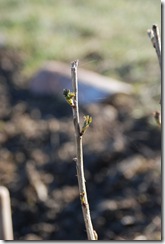
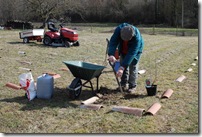
After lunch we laid out the planting of the 32 canes.   This involved measuring the position of each cane and then digging a small hole sufficient for the root structure of the individual cane.   Once the canes were set in the hole to the right height the hole was filled with a good compost to give the canes somewhere to start their new life.  The canes were placed 400mm (16") apart.

Once all 32 had been planted we simply cut the canes, where necessary, back to 300mm (12") above the ground and finally spread a well rotted manure and compost mix in between the plants as a top dressing.
Saturday, February 21, 2009

M. Gary

When I moved here a few years ago, I became the owner of the garden and a couple of fields. I was very soon introduced to Monsieur Gary, the farmer who worked these two fields. M. Gary doesn't pay any rent for these fields as, under French law, it becomes complicated if he does, but as I have no desire to take on the task of managing them, I'm happy for him to relieve me of this work.

M. Gary is now 86 and recently, following a small heart attack, decided it was time to wind down his farming activities.  Part of the winding down process was to return to my care one of the two fields he tended.  This is the location of the new vegetable garden.

Over the years, we have become very friendly with M Gary and have, from time to time, been delighted by the gift of a melon or some other thing he has grown.  M Gary tells me he isn't an organic farmer, he just doesn't use anything manufactured on his land, preferring his own compost, his own farmyard manure and saving, from one year to the next, his own seeds. He's not allowed to put the "Agricole Bio" symbol on his produce because he isn't licensed, but to my mind, he is just as much, if not more, of an organic farmer as anyone.

Because he has been farming in this area longer than I have been alive he has become a constant source of advice and information to me, and so it was, that when we decided we needed some old straw and some farmyard manure, Kate and I paid him a call.

Once we had made him understand our needs he quickly offered to drop off a bail of straw next time he was passing and he also said we were welcome to collect a trailer full of his farmyard manure, although it was fresh!!!!! Whilst we were chatting, Kate asked if he had any eggs but he sadly explained that he didn't have any available at the moment.

The next day we drove up into his farm where we found him standing in a hole almost as deep as he was tall.  He explained that since our visit he had decided to make a new vegetable patch and that he was digging a hole to plant one of the trees that would form the periphery. He pointed to the others he had already planted and showed where the rest were going. We continued on our way and soon had a trailer full of straw and manure just waiting to be composted.

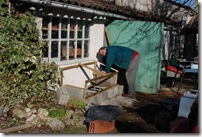
Back at the garden we were able to unload the trailer into the new compost bin we had built....  one of a row of four!!!

The next day we were again working in the garden when M Gary appeared with his tractor and our bail of straw....  I hadn't realised quite how big a commercial bale of straw is these days.... but we soon had it in position alongside the compost bins. In the conversation that followed, M Gary proudly announced that if we called up later that evening he would have some eggs for us.

As the afternoon's work drew to a close, Kate announced that she was off to make a curry and I decided this was a good time to go and collect our eggs.

As dusk fell I drove into his yard and saw him in a barn illuminated by two very old, very dim, light bulbs.  This was a barn I had never been in before and I soon discovered why.   As I walked in, M Gary was sitting on a low stool, on the far side of a large cow, which he was milking.  I didn't even know he still owned any cows, but he soon informed me, as I watched him milk, that it was his last cow and that it was to go on Sunday,  as he was no longer going to keep cows.

If I can manage it, I shall go to the farm tomorrow and watch M Gary milk his last cow for the last time. A tribute to a man who has farmed all his long life and is so much a part of our landscape.

Friday, February 20, 2009

Asparagus....

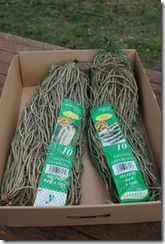
We recently bought some asparagus crowns and have spent the past couple of days preparing ourDSC_0003 asparagus bed before planting the crowns.

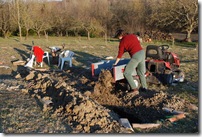
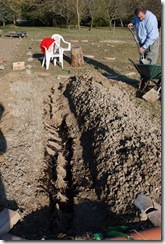
The new vegetable plot is made up, largely, of heavy clay and I took the decision, early on in the preparations to prepare individual beds as needed.   For the asparagus we decided to remove the first couple of inches (50mm) right across the 1200mm wide bed.  Next we dug a trench, 600mm (2ft) wide,a long the middle of the bed about another 150mm (6") deep and then finally we dug the deepest part of the trench, again along the middle of the bed but this time going down about a further 300mm (1ft).

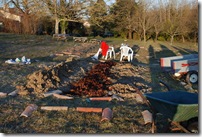
DSC_0015-1Once we had finished excavating, we filled the deepest part of the trench with well composted manure.

Using clumps of the hard clay, we then sat the asparagus crowns on individual islands about 100mm (4")above the manure and in-filled to the level of the crowns with a mixture of clay, sand and dry grass cuttings.

Next, we piled compost on the crowns to just below the finished level, again filling all around with a mixture of clay, sand and dry grass.

Finally we put a layer of leaf mould over the whole thing.DSC_0018-1

In the trench we planted 11 green asparagus (Verte Grande) and 11 white asparagus (Argenteuil).

It was nice to actually get a vegetable growing in the ground at last.  The  preparation of the land has only just begun as we are preparing the beds as required.   I have marked out all the new bed positions and, of course, had already planted a redcurrant bush in the berries bed.  But this was the first vegetable to go in.

DSC_0025 Next I prepared two beds for potatoes.  Here I just mixed sand and dry grass cuttings into the clay to a depth of about 200mm (8").  I shall now leave these two beds exposed to our frosts for a few weeks until I am ready to plant the potatoes, when I shall loosen the soil once again.

In each corner of the whole vegetable plot, I have constructed a quadrant shaped bed.   Today, Kate and I prepared the first of these quadrant beds and planted a bay tree in it.    We also planted about 6 small evergreen trees in this bed which I want to hold for a year or so, until another part of the garden is ready for them.

Tuesday, February 17, 2009

News about seeds

Some days ago, I posted about the Bloggers Seed Network.

I am pleased to say that I have since been in touch with "Miss Fuggles" of "A Blog Called Fuggles" and have arranged to receive a nice selection of her home saved seeds.  I shall be proud to try and grow these on during the coming year and hope to be able to report many successes in the forthcoming months.

Miss Fuggles is providing me with,

  • Pea Bean,
  • Poltschka Bean,
  • Black Valentine Bush Bean,
  • Kaibi Round Pepper,
  • Purple Ukraine Tomato
  • Veeroma Tomato,
all of which I'm looking forward to arriving in the next few days.

Patrick at Bifurcated Carrots has also agreed to let me have some Yacon tubers which he tells me will be here in a couple of weeks.

As well as all these,  Kate brought me a collection of seeds from the Hills and Plains Seedsavers in Adelaide.

Many thanks to all of you for your help.

The First Planting

I'm in the process of making a completely new vegetable plot for this year and was pleased on Sunday when the first plant got put in the ground.

DSC_0001-3 The plot has several beds, all about the same size and I have worked out a planting schedule for this year.  One of the beds, on the west side, is dedicated to berries and it was in this bed that I planted the first new bush I had bought.    During a visit to a garden centre at the end of last week, I found some fruit bushes which had been reduced as a result of storm damage during the recent hurricane.  There were bare rooted fruit trees and some container grown bushes, all reduced.     I bought three fruit trees and a redcurrant bush.

On Sunday, I planted the redcurrant bush in the berries bed, a peach tree to the south of the plot and a pear and a plum in the same hole in another part of the garden where, eventually, I want a little shade. The garden centre actually told me that the plum tree would pollinate the pear tree, but I don't know if this is correct....   It could be that the man was mistaken... or it could be that I misunderstood what he was saying whilst translating DSC_0010-3 from French to English!!!!!

I also bought some Asparagus crowns and spent Monday preparing a permanent bed for them.

Seed potatoes are chitting in the windowsill in my workshop and the rest of Monday was spent in preparing another bed for potatoes

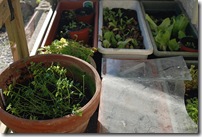
In the new cold frame we have Ching Chiang Pai Tsai (a kind of Bok Choy), Joy's Cos Lettuce, Lollo Rosso Lettuce, Batavia Lettuce all coming along as well as some herbs.  I have not grown Bok Choy before so this is part of my response to the Growing Challenge

Overnight temperatures are still dropping down to around -3C or -4C(25 - 27F) and it's proving difficult to maintain the temperature inside the cold frame above 0C  (32F)...  But it is called a cold frame after all!!   I'm trying to line it each night with some insulation material left over from some recent work carried out on the property.

DSC_0016 Last year I saved some seeds from a red cherry tomato that I grew and particularly liked.   I was rather disappointed to see that they had got damp over the winter and gone a bit mouldy but then dried again. I sowed them anyway and was delighted to see the first shoots appearing.


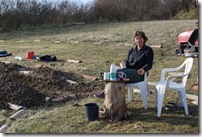
Many of you will remember that Kate is staying here with me at the moment and as you can see, she is helping a great deal with the layout and organisation of the new plot.  It was at her insistence that a seating area was included in the plan....

Thursday, February 12, 2009

Blogger's Seed Network

Patrick over on Bifurcated Carrots has for some time been promoting an idea of his to create a seed network.

The idea is simple, anyone who grows vegetables and then saves the seeds can exchange any spare seeds they may end up with.

The seed network is promoted by the individual growers and how the exchanges happen is entirely up to those growers.

DSC_0015 I've only been growing vegetables for just a year now but am happy to say that I have received many seeds from seed savers in many parts of the world.  Patrick himself has been very generous with his support of my first attempts to grow things edible.

Sadly, at this time, I don't have any seeds to offer of my own, but I am now growing seed saved from last year's crop and hoping it will turn out ok.   If this happens then I shall happily participate by offering my own seeds as part of the network in the future.

More information on the Blogger's Seed Network is available from Patrick on his page Blogger's Seed Network.

For reasons I fully understand, Patrick has asked everyone concerned to make the list of participants widely known and so here is the list, taken from his page on 12th February 2009

Of course, Patrick is also offering a large selection of seeds, with more information on his page Blogger's Seed Network

The Seed Network

Here are links to other blogs or Internet sites who are participating and I am aware of:

Bifurcated Carrots (Amsterdam)

Ewa in the Garden (Poland)

Spade Work (UK)

Mas Du Diable (France)

Alternative Kitchen Garden Podcast or Fluffius Muppetus (UK)

MustardPlaster (UK)

Lusthof (Garden of Eden) (Belgium)

A Thinking Stomach (USA)

The Veggie Patch Re-imagined (Canada)

The Cats Tripe (UK)

Soilman (Leeks, trumpet lily hybrids and pure regale species) (UK)

CityGarden (Greece)

Bishop’s Homegrown (USA)

Braamekraal Farm (South Africa)

Bifurcated Carrots (Netherlands)

Urban Food Gardening (Ireland)

Worldwide Seed Trader (USA)

Grunt and Grungy’s Garden (Canada)

The Seed Ambassadors Project (USA)

Jardim com Gatos (Portugal)

Lowarth Brogh — Offering round courgette, anna schwarz winter squash, rainbow quinoa, mexican sour gherkin and maybe some black cherry tomato seed. Interested in anything used to the cold, and anything strange,exotic(and tasty-not asking for much!) (UK)

Gardening Fool (USA)

Agrarian Grrl’s Muse (Canada)

Crazytomato (Netherlands)

Paquebot (USA)

Saith Ffynnon Farm (UK)

Blue Ribbon Tomatoes (USA)

Daphne (flat leafed parsley and dill.  US addresses only) (USA)

Brown Envelope Seeds (Looking for trades!) (Ireland)

A Blog Called Fuggles (UK/EU addresses only) (UK)

The New Vegetable Plot

DSC_0004-1

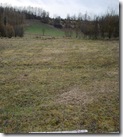
The site before we started

One of the changes for 2009 is a new location for the vegetable plot.

As you may recall, I started growing vegetables last year in a new plot I created, which then got expanded over the year.

DSC_0001

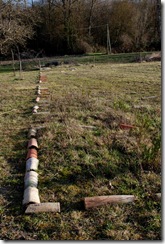
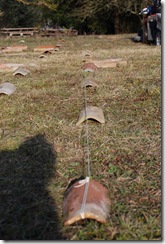
The first line of tiles defining the edge of the plot

The site I chose turned out to be less than ideal, being shaded for much of the time by trees, and even some of the deciduous trees, like the cherry and walnuts offered a lot of shade even in winter.

So, this spring I am intending to plant into a completely new plot and preparations have begun.

After a lot of discussion, I have decided to create beds which are about 7m x 1200mm.  I have found that 1200mm is a really good width for a bed as it is easy to reach the centre from either side making everything in the bed easily accessible.

DSC_0005

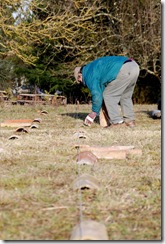
Quickly aligning tiles

I'm also now tending to start to think in terms of 1200mm squares for planting individual crops, so again, 1200mm wide beds are ideal.  In last year's garden I grew 1200mm squares of garlic, spring onions, leeks, broad beans, peas, red cabbage and strawberries, so this was the starting point for my thoughts about the new plot.

    
DSC_0007

Minimising the errors

I'm fortunate in that I have a sizable piece of land, not far from the house which is not shaded by any trees, and this where I have decided to locate the new plot.

The piece is far bigger than I will ever manage as a vegetable garden but I have decided to create an extensive design and then bring into operation beds as and when I need them and am able to.  I still need to do some soil testing but at first look it appears that a lot of amendment will be needed as much of the land seems to consist of a fairly heavy clay.

DSC_0002

The first bed laid out

Having decided to go with this project, the first thing I did was to decide on a size of plot that will last me for several years.  As I said, the overall plot is bigger than I will manage this year but by knowing the eventual size, I can hopefully avoid having to move things too much in future years.

Once that was decided I started to break iup the plot into individual beds and quickly came up with 7m x 1200mm beds as ideal.   

DSC_0004

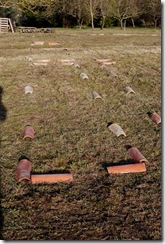
A quadrant bed

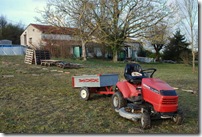
There is a path around every bed, 650mm wide, enough for a wheel barrow to be put down.  I have also threaded some paths which are 1500mm wide so that I can get my little tractor and trailer in to garden if I need to move big or bulky items.

In the layout of the beds we considered such things as sunlight, prevailing winds, slope and frost, and proximity to things like water and compost.

DSC_0009

At the cross roads

Once I had a drawing of the bed layout and was happy that I had used the space to best advantage and also produced a versatile design that will stand for many years, I started to set out the bed on the ground.

The size of the bed turned out to be about 1/3 of the piece of land I referred to earlier and I chose to divide the piece in to 3 and use the centre section.

I then cut the grass in this area, keeping the cuttings for use in the soil amendment.

DSC_0020

The helping hand of machinery

Next came the marking out of the piece and the beds.

We gave quite a bit of thought to our planting for 2009 at this point and decided to make the beds which were going to be planted and leave the rest fallow until such time as we were ready to progress further.

DSC_0015

UH OHH!!!

I have a load of old roofing tiles and these were pressed into service as markers for all the beds and paths.

During all this planning, I also visited the local garden centre who, of course, had wonderful offers on both potatoes and asparagus, which were too good to be ignored, so these two items came home with us, defining the first two beds to be prepared.

DSC_0014

The end of the day.

In the end, the layout gives three beds in a row with 4 rows between the main tractor routes, and I decided to opt for preparing a half of this space with just 2 rows of 3 beds.   We also decided that we would include a circular seating area and a quadrant shaped bed in each corner.

Laying the tiles was surprisingly time consuming but in the end we had all six beds and the seating area nicely defined in beautiful old Mediterranean Roman Canal tiles, as well as the outside edges and all four quadrants.

Tuesday, February 10, 2009

A Cold Frame

Kate, of Hills and Plains Seedsavers has been staying here for the past couple of weeks and has talked me into making extensive changes in the Kitchen Garden.

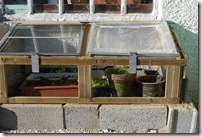
DSC_0001 The first change was realised during last week when I finally finished the cold frame I have been building in time to put our new seedlings in.

You might notice that half of the top frame is not covered in glass but in a piece of plastic.  This is due to a discovery I made during the construction that glass doesn't normally bend or bounce, preferring to shatter into several pieces......   Sadly, the local glass merchant could only then offer me 2 or 4 mm thick glass and of course I need 3mm!!!!!

Kate keeps referring to this thing as a seed frame but I've always known it as a cold frame.  We used concrete building blocks which we then filled with sand, toDSC_0013 give us some thermal mass, in the hope that the blocks will hold heat gained through the day to warm the frame through the night.

I've put in a maximum - minimum thermometer to record the temperatures and from day one we made a small  temperature gain over night of a couple of degrees.  I hope that gain will steadily increase as the weather improves and the blocks warm.

The frame now has a few things which I have over wintered in it and is ready to receive some new seedlings as soon as they are ready.

Pickling Beetroot

One of the things that Kate has discovered whilst staying here has been my pickles, particularly beetroot and red cabbage.

I pickle them both myself to my own simple recipe and usually keep a jar in the fridge to eat with salads, meats or cheeses.

DSC_0008-1 As we had run out of pickled beetroot, Kate asked if I would make some more, so, on our visit to the local market this morning I bought some beetroot.

This dragged the first stunned exclamation from Kate when she discovered that  the beetroot being sold on the vegetable stalls of the market had all been boiled.  We searched the market but could not find a single trader selling raw beetroot, all that was for sale was previously boiled.

I bought two good sized round beetroot, selected a couple of jars of about the right size and after preparing the jars set about pickling the beetroot.

All I do is boil a mixture of vinegars with some pickling spices and a little sugar and then pour the boiling vinegar onto the beetroot before sealing the jars.  If I don't have a mixture of vinegars then a strong vinegar mixed about 50/50 with water will do.

If pickling spices are not available in your area then I use whole peppercorns, as many varieties as I can easily get, a few small chillies, coriander seeds, mustard seeds and a bay leaf or two.    I make up the pickling spice and then use about a teaspoon in a litre (US Quart) of vinegar.

Don't forget to let the jars cool before storing.   I keep the sealed jars in my preserves cupboard but opened ones in the fridge.

Oh, it's ready to eat after about 24 hours but improves over the first few weeks.

Thursday, February 5, 2009

Surviving the Storm

A few days ago, this part of France was battered by an intense storm.

Friday started out like most other days recently, fairly cold with a frost on the ground and a light fog hanging in the air.  As the day progressed, a light wind blew the fog away but by the end of the day the wind was blowing fairly steadily.

tractor_portOvernight, the wind continued to increase in strength until, at one point, they were recorded as being in excess of 180 kph and we were in the midst of a hurricane.  The area around Kitchen Garden In France was one of the worst hit areas in the region, with the storm lashing the country from here, south, into Northern Spain.

We awoke several times in the night to a howling wind, rattling windows and shutters and even the ominous noise of roof tiles lifting slightly before dropping back down.   Eventually morning broke and we discovered the house no longer had any electricity, although, fortunately, it still had an intact roof!

Saturday is market day at Villereal, so we were soon on our way, travelling the few kilometres across benchcountry and starting to realise the extent of the storm that had hit.  ?Fields and whole paddocks were flooded, tree trunks were snapped in half with the trees carelessly thrown into the road, and everywhere, debris demonstrated the force of the storm that had just passed.

Villereal was eerily quiet for a Saturday morning, and we soon discovered the reason.  The traditional morning market had been cancelled.  The car parks, normally packed with cars were lying empty.  The "centre ville" normally closed to all traffic for the market was still open.   The cafes and bars, normally full of bustling marketgoers were all but empty.

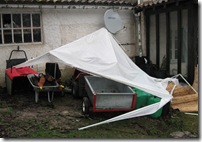
We took coffee at our usual bar where the proprietor was delighted to see us.  After breakfast, coffee and a gazebocouple of viennoiseries, we returned to our car, taking the alternate route home but finding just as much devastation.  A small forest was flooded and about half the trees had been toppled, the oots having been loosened by the floodwater.  It was strange the way it seemed to be every other tree which had toppled.

We got home to discover that we were still without power.   A clock showed the that we had lost power about 5 am and as it was now nearly 1pm that was 8 hours previously, a long time for a power outage in this area.

pool_houseThe storm was still blowing hard and we spent the afternoon making up our log fire to keep warm.

We have a couple of kerosene heaters, along with our large wood burning chimney, so keeping warm wasn't going to be much of a problem.  Dusk fell and we lit the house with candles, before enjoying a lovely meal.

Happily, our cooker is "dual fuel", which means the oven, grill and one burner are electric and the other three burners are gas.

Sunday morning came and the house was distinctly cold. There was still no electricity and overnight temperatures had dipped low.

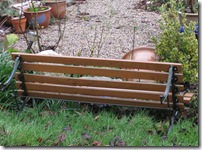
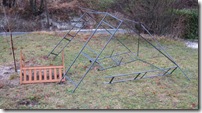
However the wind had died down so we took the opportunity to go out into our own garden and check what damage had been suffered.   My first concern was the fabric of the house but I quickly established that everything was still sound.  I have a couple of old chimney stacks but they were still standing and there was no damage to the roof.    One of our neighbours was less fortunate and lost part of his roof and another had two large trees blown over.

The phones and the power remained out for most of the following week, finally being reinstated on Friday.

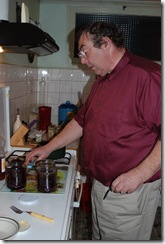
I was pleased that we had a cooker which ran on bottled gas, or at least, three burners, which allowed us to prepare hot meals.   It was interesting though, trying to prepare a meal. using only hot plates and candle light.

I enjoyed this dish of mackerel sauteed with red cabbage, kale and mashed potato, prepared during one of the early days of the power outage

IMG_0378 IMG_0381